Overview
You can create a custom group to aggregate search terms data from specific ad groups across different campaigns and import the search terms to another ad group. This method applies to multiple campaigns and ad groups associated with the same ASIN.
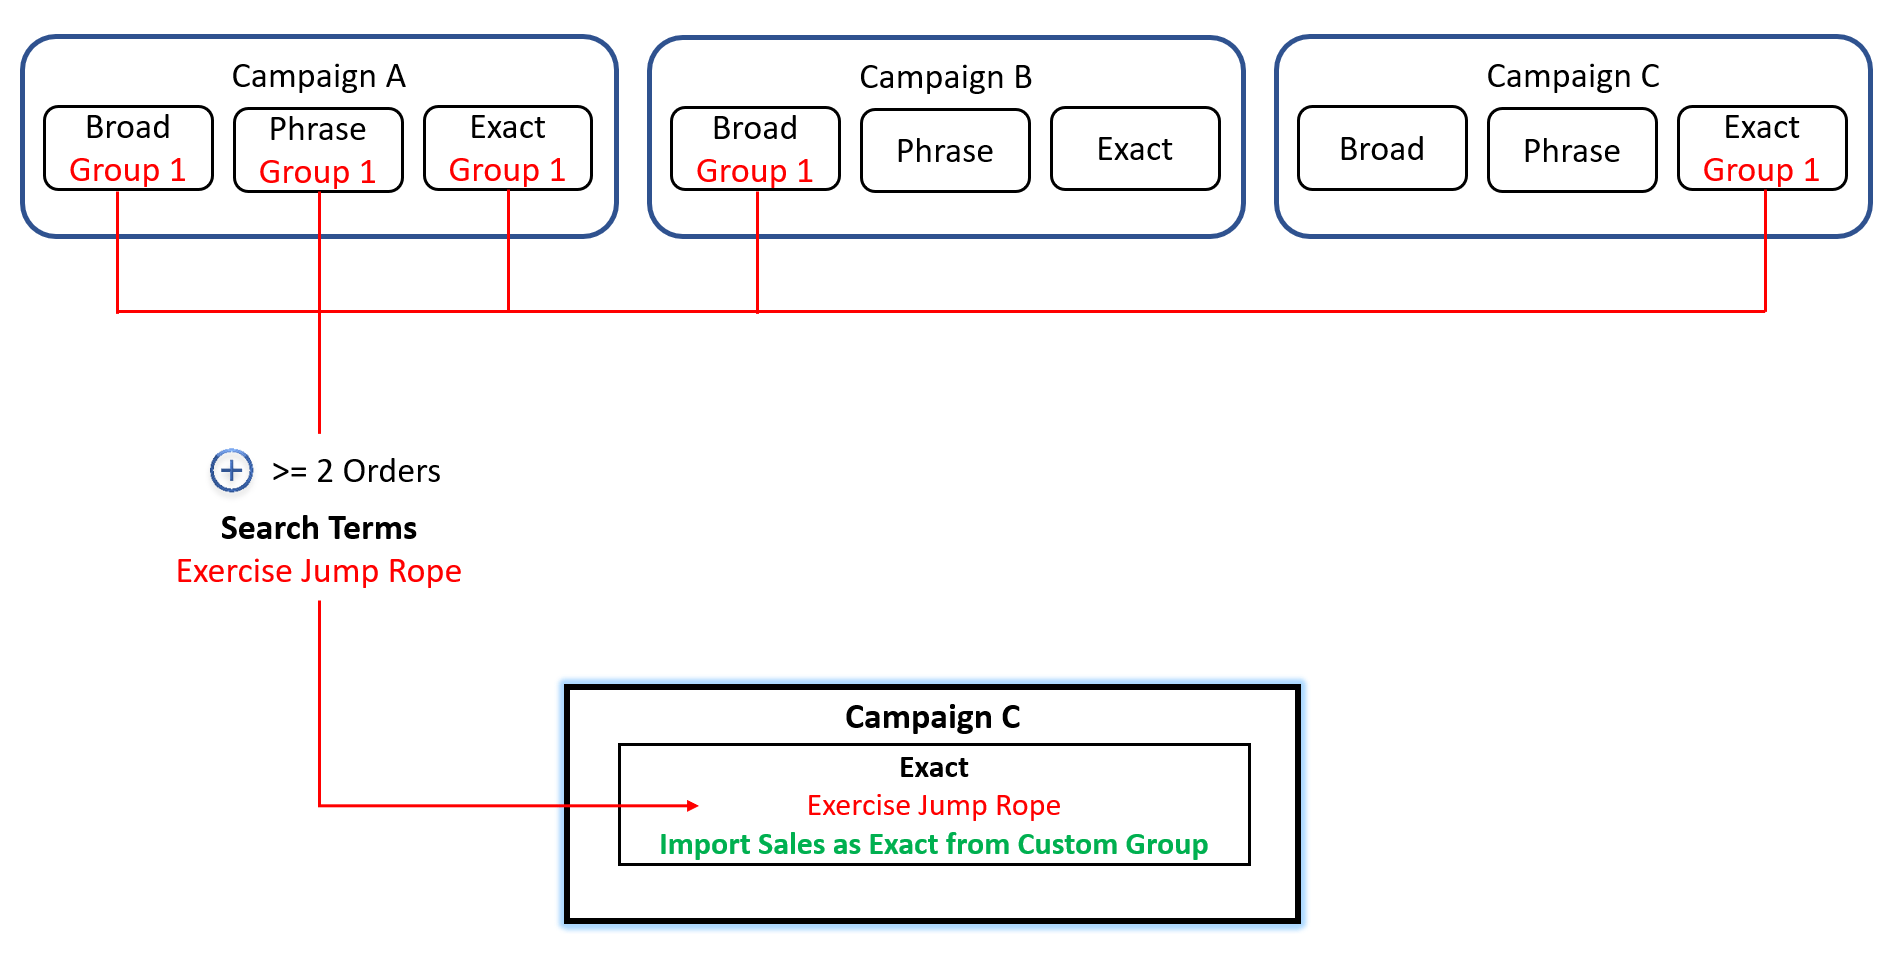
For example, you import search terms with orders from ad groups in Campaigns A and B to an ad group in Campaign C.
All the tagged ad groups inside Campaigns A, B, and C will form a "Search Term Pool" called "Group1".
Suppose aggregated search terms meet the import criteria (i.e., >= 2 orders). In that case, it will add these search terms in Campaign C (or your selected destination) as an Exact match (or based on your selected Import Rule).
Use Case
In this example, we will import search terms only from Broad and Phrase Match ad groups to the Exact Match ad group.
Also, we will negate the imported search terms in the Broad and Phrase ad groups to isolate the terms in the Exact ad group for targeting.
Note: Negating the search terms is optional, depending on your preference and strategies. We're only using search term isolation this time as an example.
- Search term criteria: Import search terms with >=2 Orders as Exact match type.
- Source ad groups: Research Broad & Research Phrase.
- Destination ad group: Launch Exact.
Creating a Custom Group
1. Navigate to Automation > Import Rule > Create Rule.

2. Click on Search Terms Source (Custom Group).

3. Look for the ASIN and click the Edit button to create the custom group.

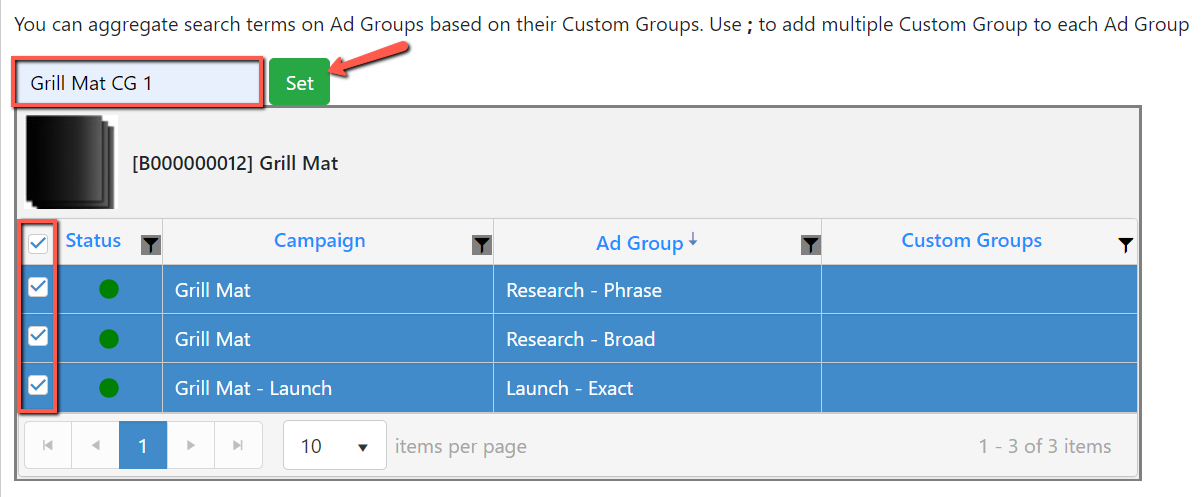
4. Select the Source and Destination ad groups, give them a custom group name, and click Set.
In this example, the custom group name is "Grill Mat CG 1."
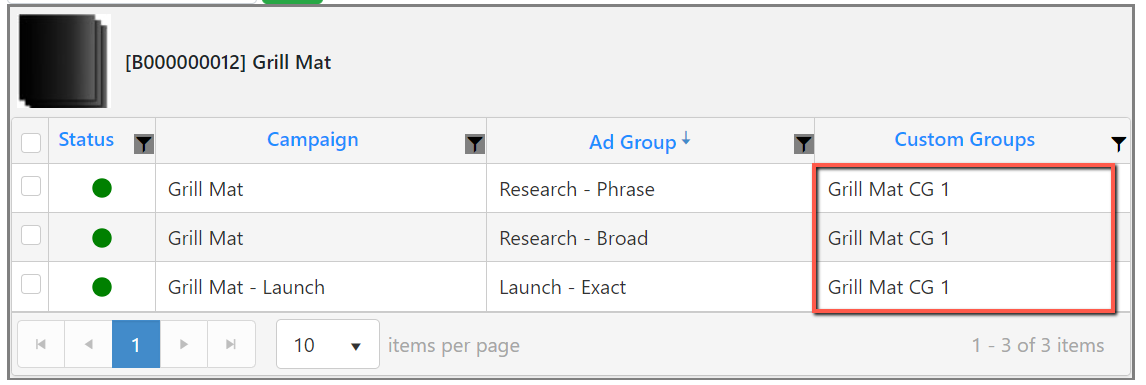
After setting, the custom group name should appear in the Custom Groups column for all the selected ad groups.
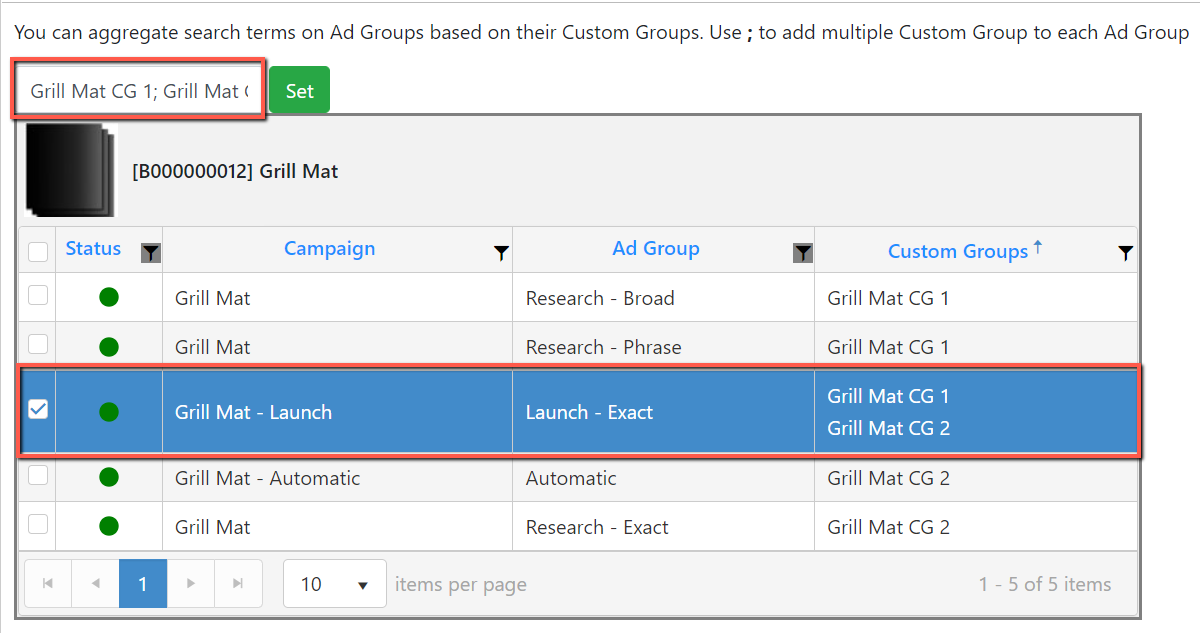
5. You can also see all the created custom groups by going to the Assigned Custom Groups tab.
.png)
Bulk Uploading Custom Group
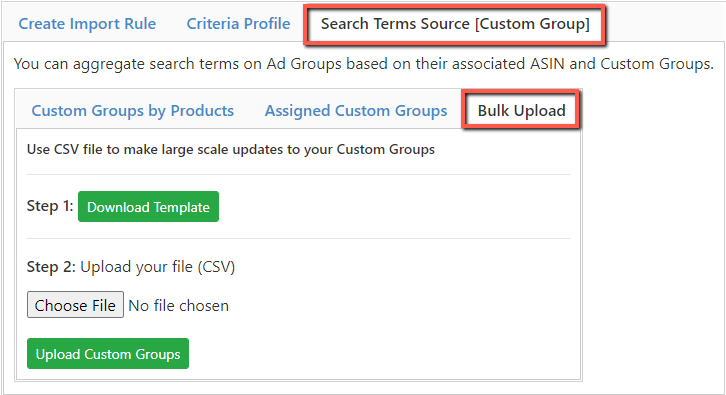
You can make bulk updates to your Custom Groups using a CSV file format which is a great way to save time and reduce errors.
1. Click on the Search Term Source (Custom Group) and click on Bulk Upload. Follow the provided steps.
2. Set Filter on the table and search for the ASIN you wish to create a Custom Group. Assign the Custom Group and upload the file.

3. Once done, check the Assigned Custom Groups tab to see if the changes are reflected.
Creating Import Rule with Custom Group as Search Terms Source
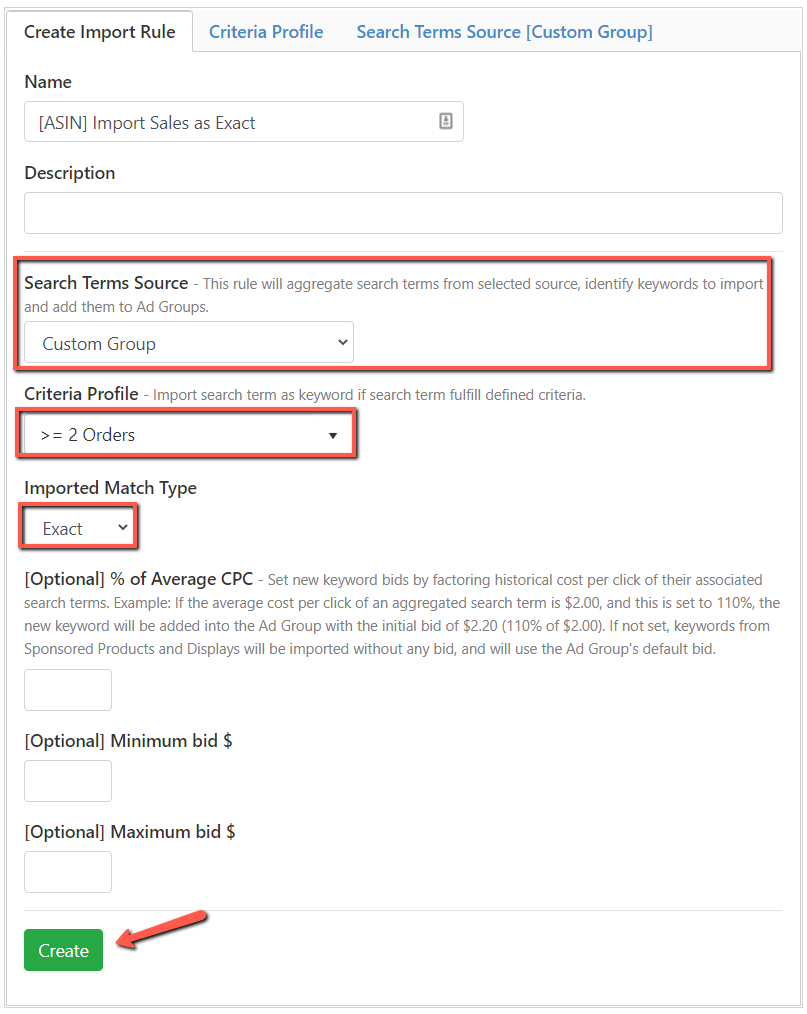
1. Navigation: Automation > Import Rule > Create Rule > Create Import Rule
- Enter the Import Rule's name and description.
- Choose Custom Group on the Search Terms Source.
- Select a search terms criteria from the criteria profile.
- Select the match type of the imported search terms.
- Click on Create.
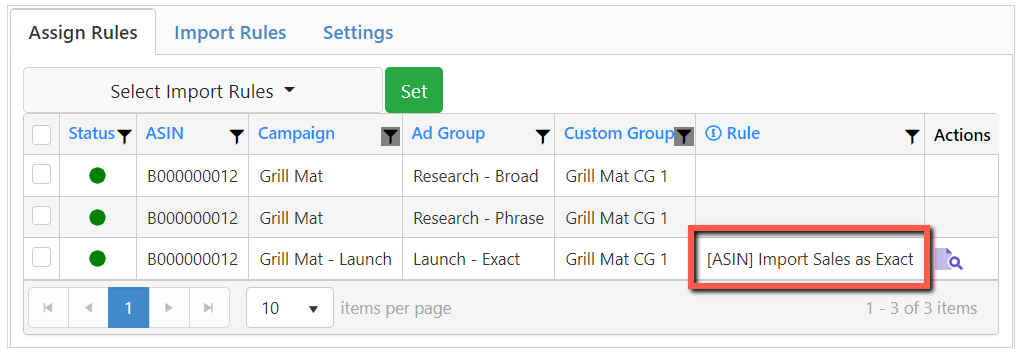
2. Assign the created Import Rule to the Destination ad group.
(Optional) Assigning a Negative Rule to the source ad groups
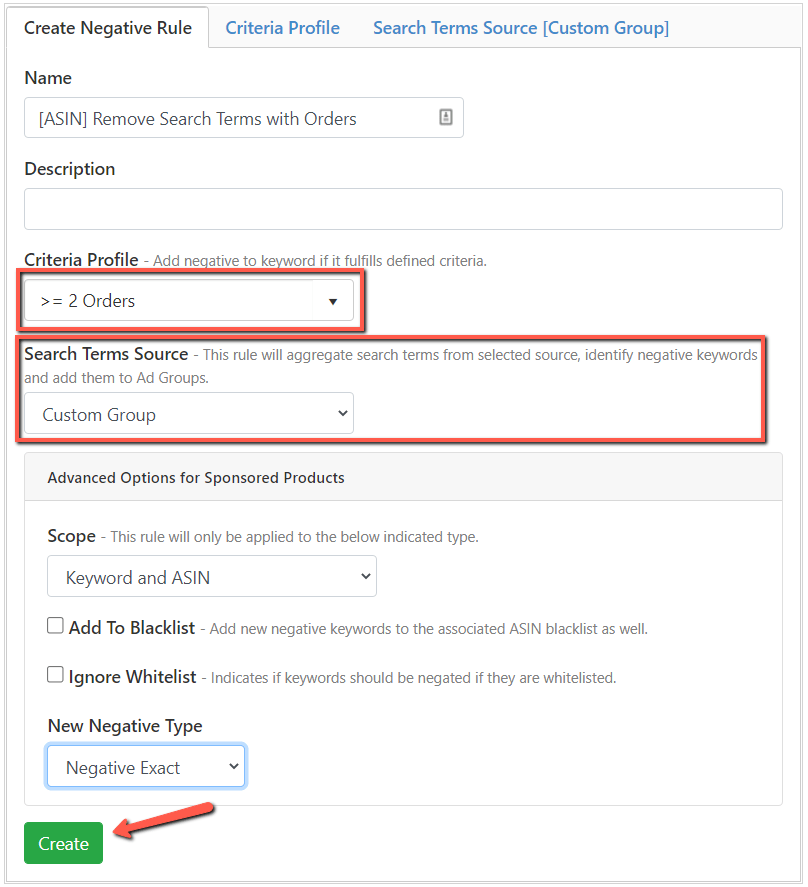
1. Create a Negative Rule to negate all the search terms in Broad and Phrase ad groups that SI imports to the Exact Match ad group. The Negative Rule will apply the search term isolation method where keywords are negated in the ad group(s) to avoid duplication.
- Enter the Negative Rule's name and description.
- Select a search terms criteria from the criteria profile (same criteria used in importing the search terms).
- Choose Custom Group on the Search Terms Source.
- Select the match type of the negated search terms.
- Click on Create.
2. Assign the Negative Rule to the Source ad groups (i.e., Broad and Phrase ad groups).

Note: You may select a single source ad group and use different criteria to import search terms based on your advertising goal and strategy.
Multiple Custom Groups
You can create custom groups that use multiple ad groups to create two or more "Search Term Pools."
For example, in Group 1 and Group 2, SI will import any aggregated search terms that meet the criteria to the destination.
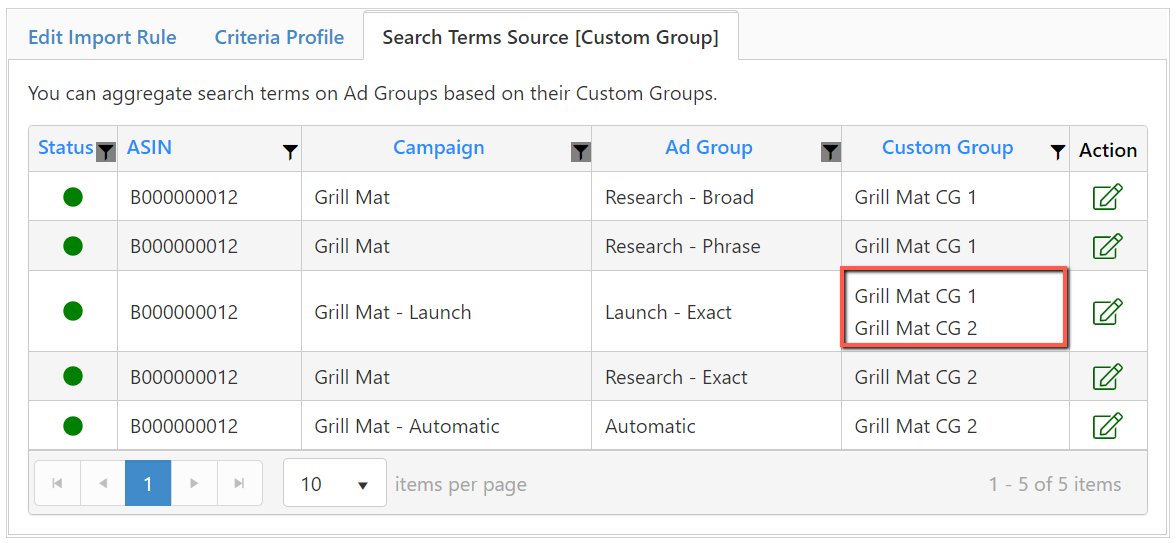
When adding two or more custom group identification to one ad group, add a semicolon ";" between each custom group name.
